Simple Partial Die Cutting with the Charming Floral Border | Angela Simpson
Hi friends! Angela here today, and I'm excited to share a project with you that features the new Charming Floral Border suite of goodies from the latest release. I've been foiling up a storm lately and just can't get enough of the gorgeous hot foil plates that Pinkfresh has been coming out with. The Charming Floral Border is one of my favorites so far, and in this card I've also incorporated the coordinating die, stamp set and layering stencils.

While my foiling machine was heating up, I prepared my champagne-colored heat-reactive foil and the Charming Floral Border plate, securing them in place horizontally across a white A2 cardstock panel with a piece of low-tack tape. There were pieces hanging off the ends, but as you can probably tell in the finished design, this was intentional. I highly recommend using a light washi or other low-tack tape while foiling because it really helps to ensure that things don't shift around in the process. (I don't know about you, but it pains me to let precious foil go to waste on mistakes!)
When the machine's timer light indicated that the sandwich was hot and ready for my die cutting machine, I ran it through and peeled back the foil. That reveal moment always has me holding my breath, and I love that just like all of the other Pinkfresh plates, this one foils absolutely beautifully! Next, I moved onto the stencils and chose inks in Tidal Pond and Warm Buff. This stencil set has 4 pieces, but I kept things simple with just 2 ink colors and used a slightly heavier hand for the detail layers.

Once the whole image was colored in with ink, I used the coordinating die to partially die cut just the bottom portion of white cardstock away. If partial die cutting is new to you, don't worry - this isn't tricky at all! I simply offset the cutting plates in my die cutting machine with the top one a little further back. This meant that the area on my cardstock that I didn't want to cut (above the floral) was not sandwiched between both plates, and instead, was left exposed - kind of like an open-faced sandwich! Of course, you could achieve a similar result by just cranking the sandwich partially through your die cutting machine and then reversing, but I like this method because it offers a lot more precision.

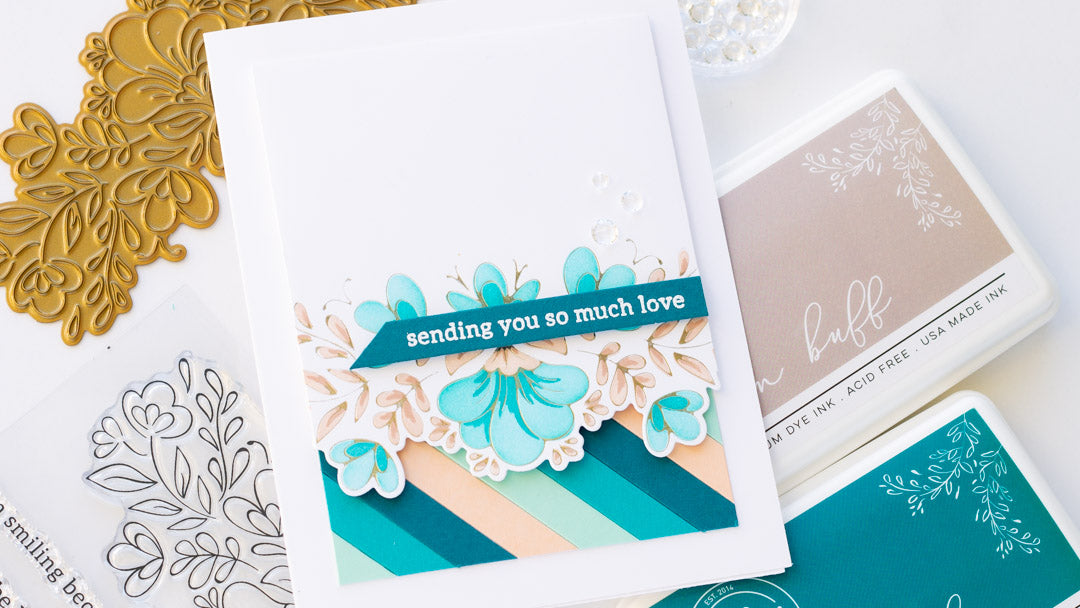
With my die cutting machine still out, I also cut some diagonal cardstock strips using the Color Block Diagonal Stripes die. I adhered these onto a panel of plain typing paper, trimmed it to the same width as my foiled panel (3.5" wide), and secured the floral panel on top with foam tape for dimension.
The sentiment for this card is from the Charming Floral Border stamp set, and conveniently, the font size allowed the words to fit perfectly on my leftover strips. I heat embossed the 'sending you so much love' in white for some contrast, adhered it to my card with a skinny foam strip, and finished with a few clear crystals.

Thank you so much for stopping by to check out my card today, and I hope you feel encouraged to give some partial die cutting a go if you haven't before. Until next time, happy crafting! - Angela
1 comment
Love your card and the combination of floral and geometrical