
Star shaped Mini Album | Susi Becerra
Hello crafty friends! It's Susi here today sharing with you a new Christmas project with the beautiful Happy Holidays collection from Pinkfresh Studio. Today we are going to create a star shaped mini album using the Nested Stars Die set and we are going to add foil with the Nested Stars Hot Foil and the Glimmer Hot Foil System machine.
I love to use gold in my christmas projects so glimmer hot foil roll - GOLD will be the main item in the mini album.
Let's get started!


I started off by hot foiling the big star using Nested Stars hot foil and a piece of white cardstock. Then, I used the Nested Stars die to die -cut the star out of the white cardstock. I repeated the process five times.
Next, to continue with the hot foil I also used the gorgeous Snowflakes hot foil and Merry & Bright hot foil, Then, I used the coordinating dies to die cut the snowflakes an the phrase out of the white cardstock. I also decided to use the Solid Hor Foil Plate to do the reverse hot foil step and get a solid gold star. It's so fun! I love this technique!


Once we get all the foiled pieces made, we are going to die cut stars using patterned papers from the Happy Holidays collection. We will use those stars to cover the back of the foiled stars.


Next, we are going to die-cut stars using the medium size die. We'll use white cardstock folded in half to create double pages. To make this leave the vertex of the star die off of the paper to cut. Then I die cut patterned papers to cover the front of the doble pages. Then, I printed my photos and I used the same die to die cut them because I arranged the photos inside of the double pages. I also die cut a photo using the big star die.

The next step is to stick the double pages on the big foiled stars. To complete the mini album I used the Snowflakes Background Stamp to create a new page. I heat embossed the stamp image in gold.

Now It's time to decorate and complete our mini album. YAY! To do this I used Cardstock Stickers, Ephemera Pack, Puffy Stickers, Wood Accents, Tag Ephemera. You have infinite possibilities to decorate the mini. I added a tag with a photo, hot foiled snowflakes, the Merry and Bright... You can add all you want.


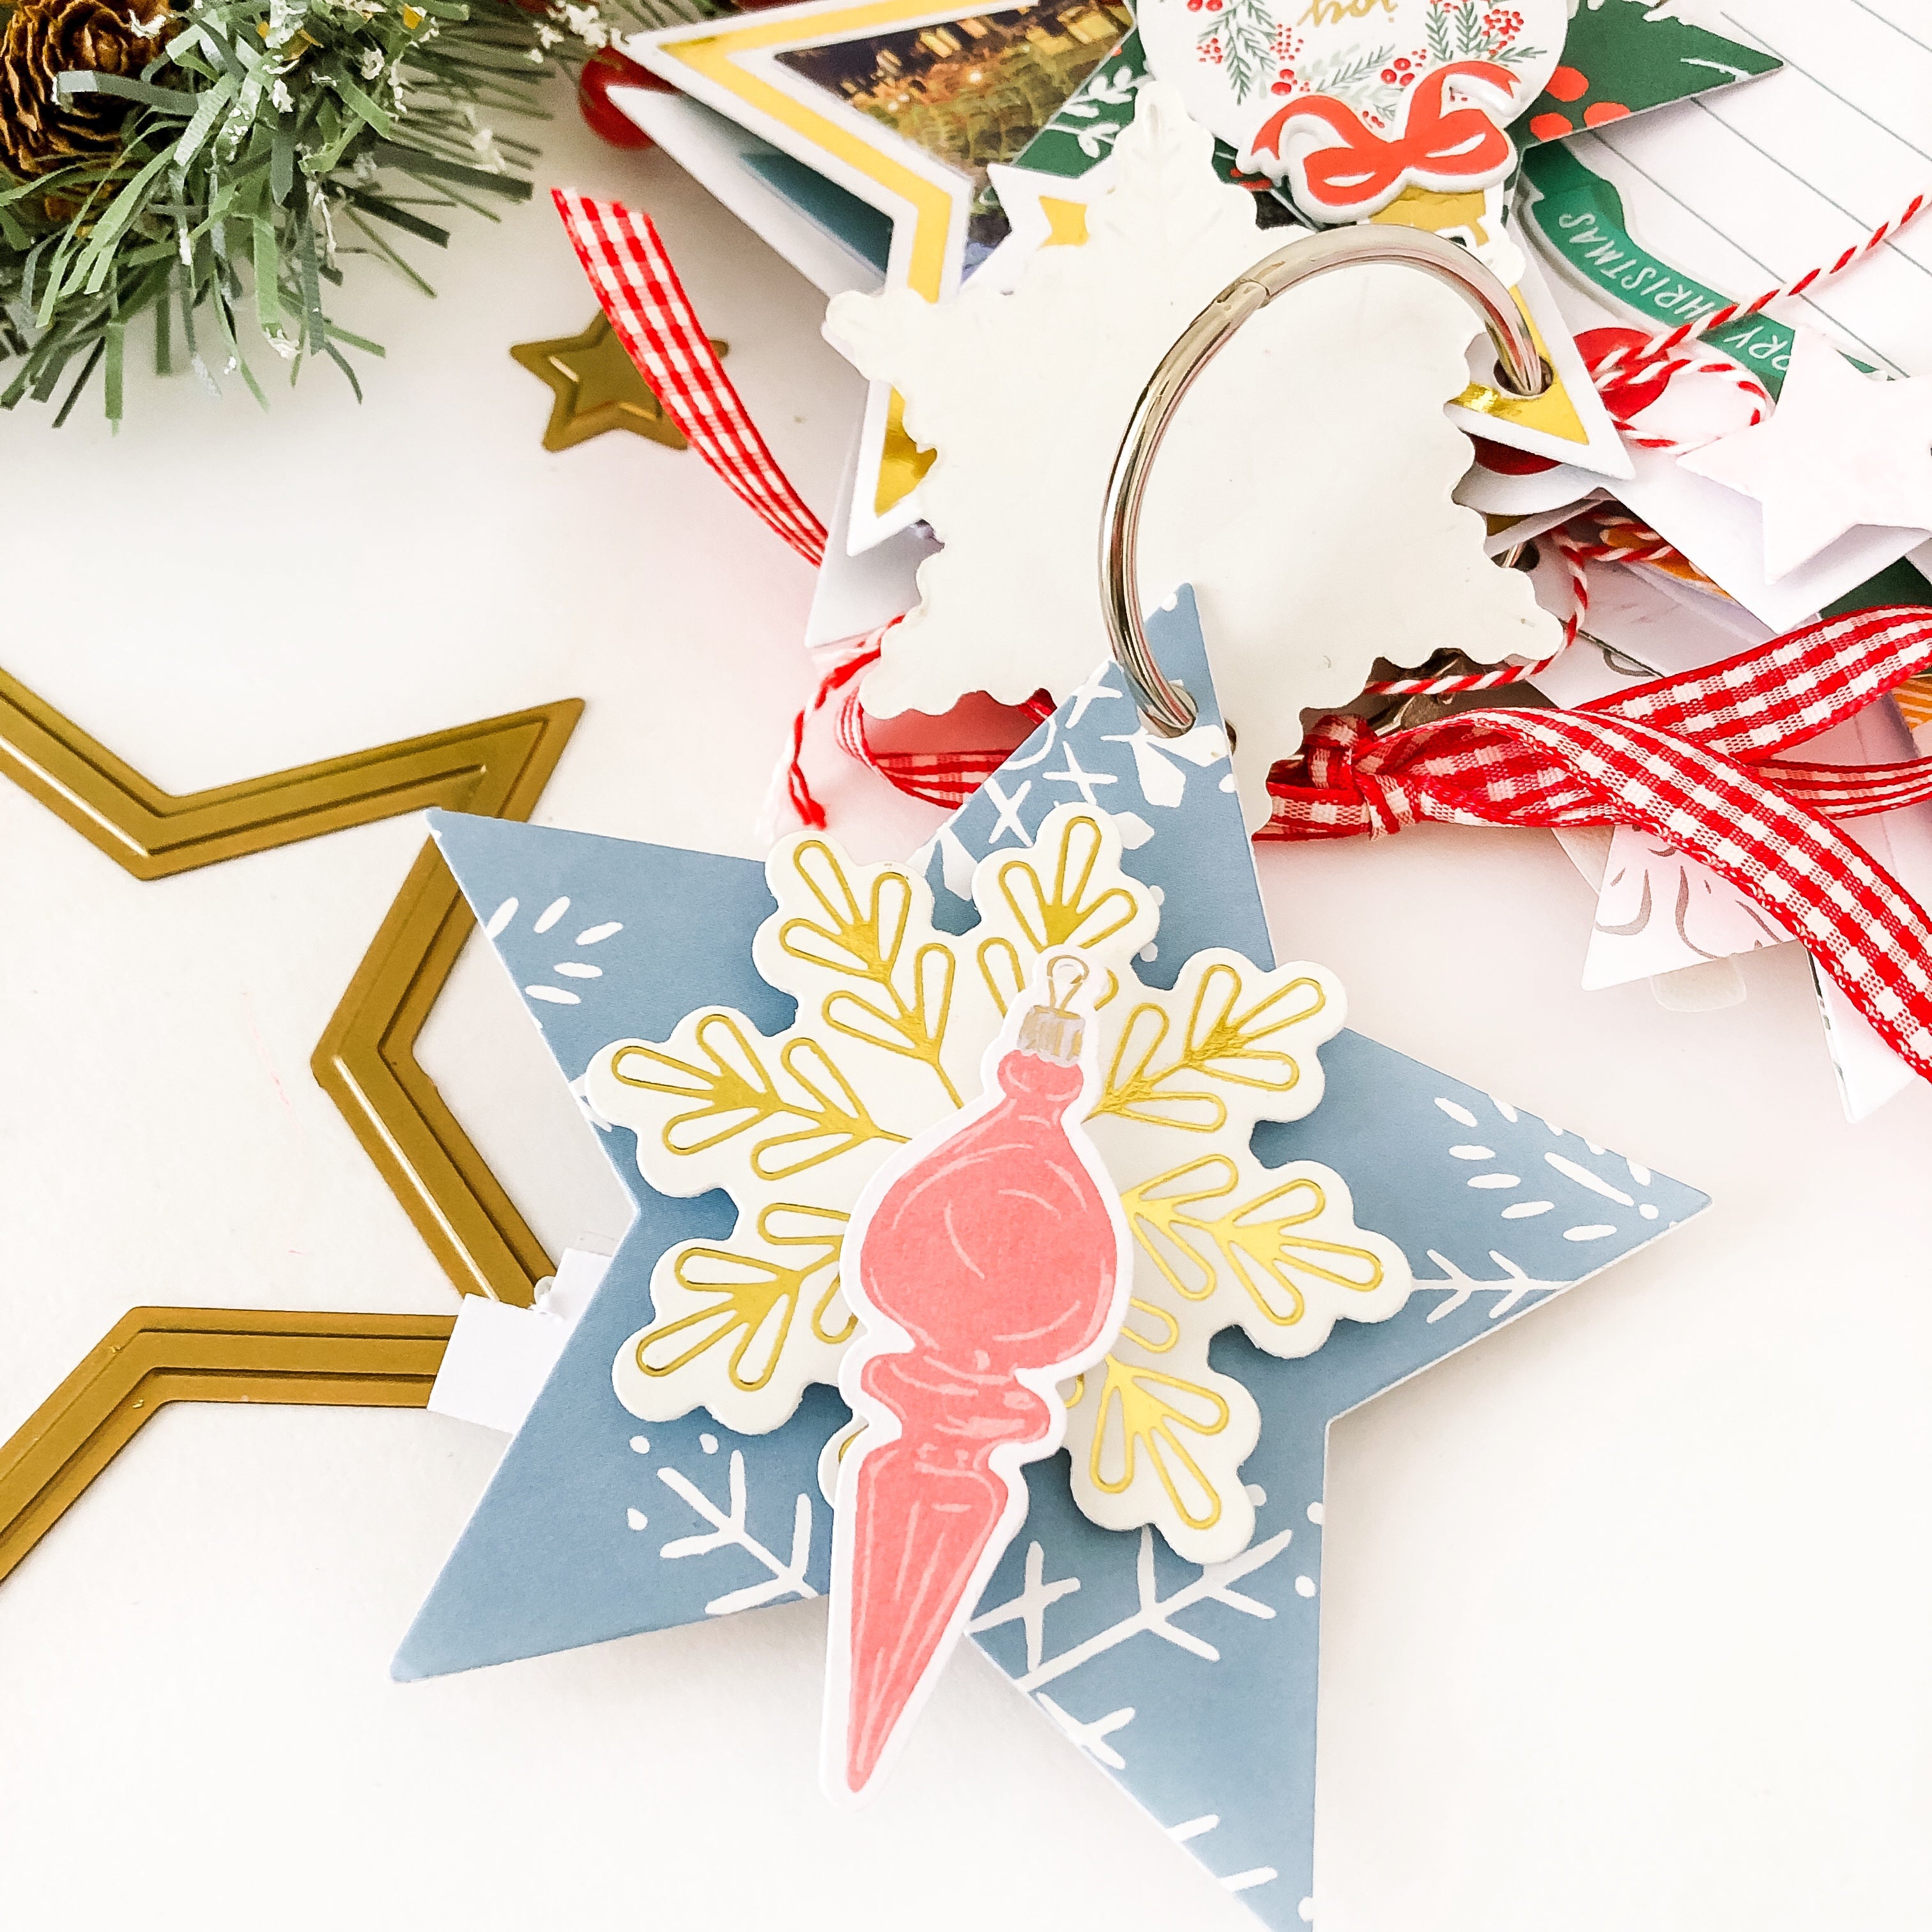
Finally, I arrange all the pages in a ring. Also I created a structure to keep the mini album. The size of the cover and backcover is 4 1/2" x 4 1/2" and the spine 2 " w x 4 1/2" h. I used white cardstock to cover the three pieces, Then I cut a piece of cardboard of 4 1/4" x 4 1/4" and cover it using patterned paper. Then I glued this piece on the cover. I also did the same with the spine. I cut a piece of cardboard of 1 3/4 "w x 4 1/4" h and cover it using the same patterned paper. To decorate the cover I used tags and an element from Ephemera pack. To attach the mini inside the structure I punched a hole on top of the backcover.


Add ribbons, pearls, colordrops.... to decorate your mini album and fiil it with sweet memories. Merry Chritsmas! Thanks for stopping by. I hope you liked it and inspires you. See you next year!