My Happy Life Project | Celes Gonzalo
Hello crafters! How are you today? It's Celes here.Today I have a super special project to create with you. Before we begin working, I have to say that we are going to make this project in two parts. First part (which we will work on today): we are going to decorate our little house. Second part (which we will work on later): we will make the inner mini album.

To prepare this lovely project I'll be using the Happy Heart Collection . As I told before... I'm in LOVE with it! For me is a source of infinite inspiration.But you can use any of the latest Pinkfresh Studio collections! ;)

The Happy Heart Collection has a beautiful paper full of windows of different designs. It's the one which inspired me to buy a little wood house and decorate it with the Happy Heart 12x12 Paper Pack. No matter the size of the house, you can use the one you want.
NOTE: Before starting to decorate the house, make a template of it. Simply transfer the outline onto a sheet of paper. Once you have the template, you can scale it as much as you need or make your own cut file.

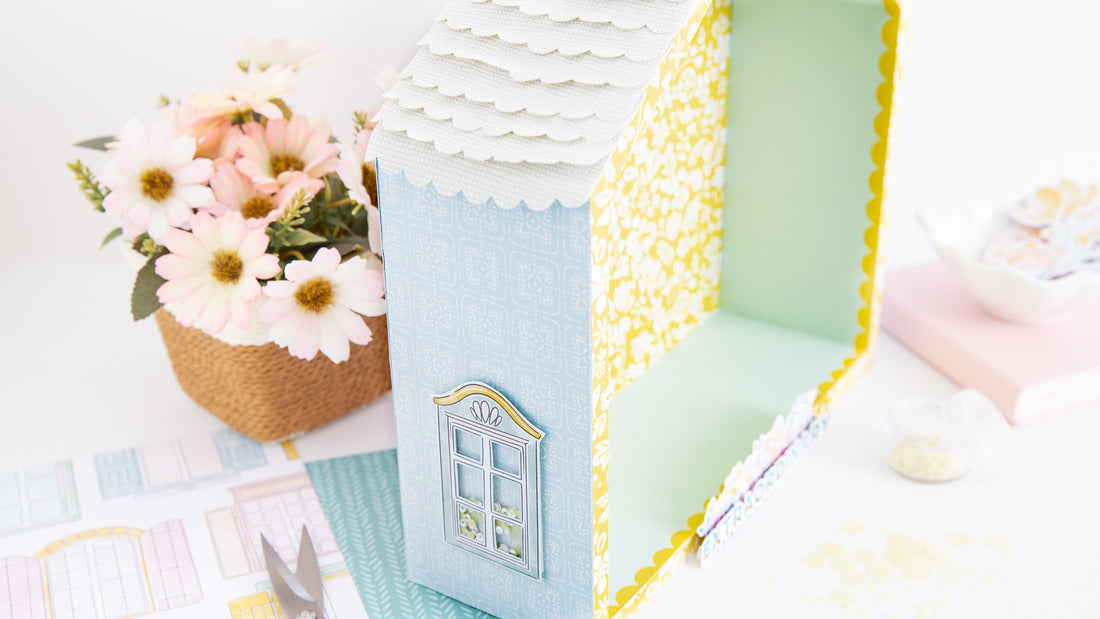
To decorate the house I chose 4 design paper from the Happy Heart 12x12 Paper Pack. One for the back, two for the interior and one for the sides.
For the back of the house: outline the house onto a design paper and cut it.
For the interior of the house: repeat the same steps as for the back and measure the edge of the house (you will use those cuts to decorate the front of the house). Use a different design paper for the interior sides of the house (including the roof on the inside).

Tip: apply an even layer of glue to stick the papers to the structure of the house. Remember to use a folder to remove possible air bubbles.
Cut and glue all the papers for the structure before starting to make the windows shakers.
Front of the house: I used one piece of the Title Ephemera Pack and one of the Floral Ephemera Pack to decorate the front. I will not add more details since I will make a mini album.

For the roof: I use one of the dies from the Essentials: Classic Edgers Die Set to cut some specialty paper that I had. You can use any type of paper you like. The idea is to glue them in layers using 3D foam to give it dimension.

Shaker windows: now we will make the shaker windows :) Love them! I must confess that it is my favorite moment!

I cut 4 windows for the back of the house and one for each side. Use a cutter to cut out all the inner window shapes and add acetate and foam 3D to create the shakers.

Fill all windows with beautiful and colorful beads and sequins. You have to options: 1- use the paper of the structure as the back of the shaker, 2- add white paper before gluing the window to the structure.

Don't they look lovely? :) This is the first part of the decoration... when making the mini album we will add more beautiful details...

Thanks for stopping by! I hope you like this idea ;)
See you next time! :)