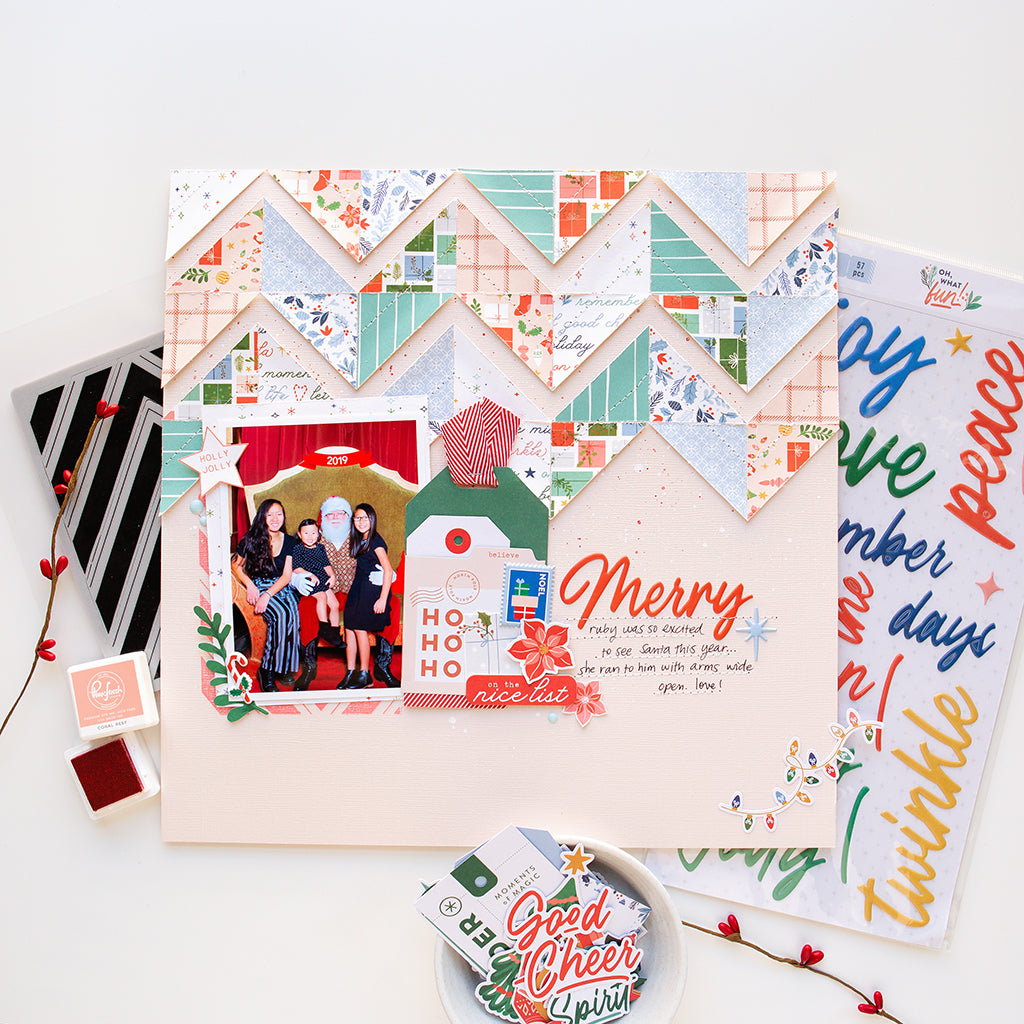
Merry, featuring Oh What Fun!
Hello crafty friends! It's Jung here, and today I'm sharing a holiday layout using the new holiday collection Oh What Fun!

Are there techniques that you've always wanted to try, but never have for whatever reason? For me, it's the chevron technique that I've seen several of my fellow scrapbookers create. I wanted to use some of the gorgeous pattern papers from the 6×6 paper pad, and so I decided it was the perfect opportunity to give the chevron technique a try.

I started off by trimming a 1 3/4 inch strip from a few of the 6x6 pattern papers. I cut the strip into 1 3/4 in squares, then trimmed then diagonally down the middle to create triangles, and distressed the edges a little bit. I laid the triangles out on my desk creating the chevron pattern, trying to decide on a pattern. I tried random, I tried using the same pattern for each parallelogram piece, but in the end, I decided for a tone on tone piece. For example, for one parallelogram piece, I used the pink plaid pattern paper, along with the pink pattern paper with all the christmas images.
Next, I chose a light pink cardstock, and splattered it with white splatters and red splatters. (I mixed the Candy Apple and a little bit of Clementine watercolors to create a warm red.) Then, I adhered the chevron pattern on the cardstock using just a little bit of adhesive. I wanted to add machine stitching to the pattern to create a more cohesive quilted look.
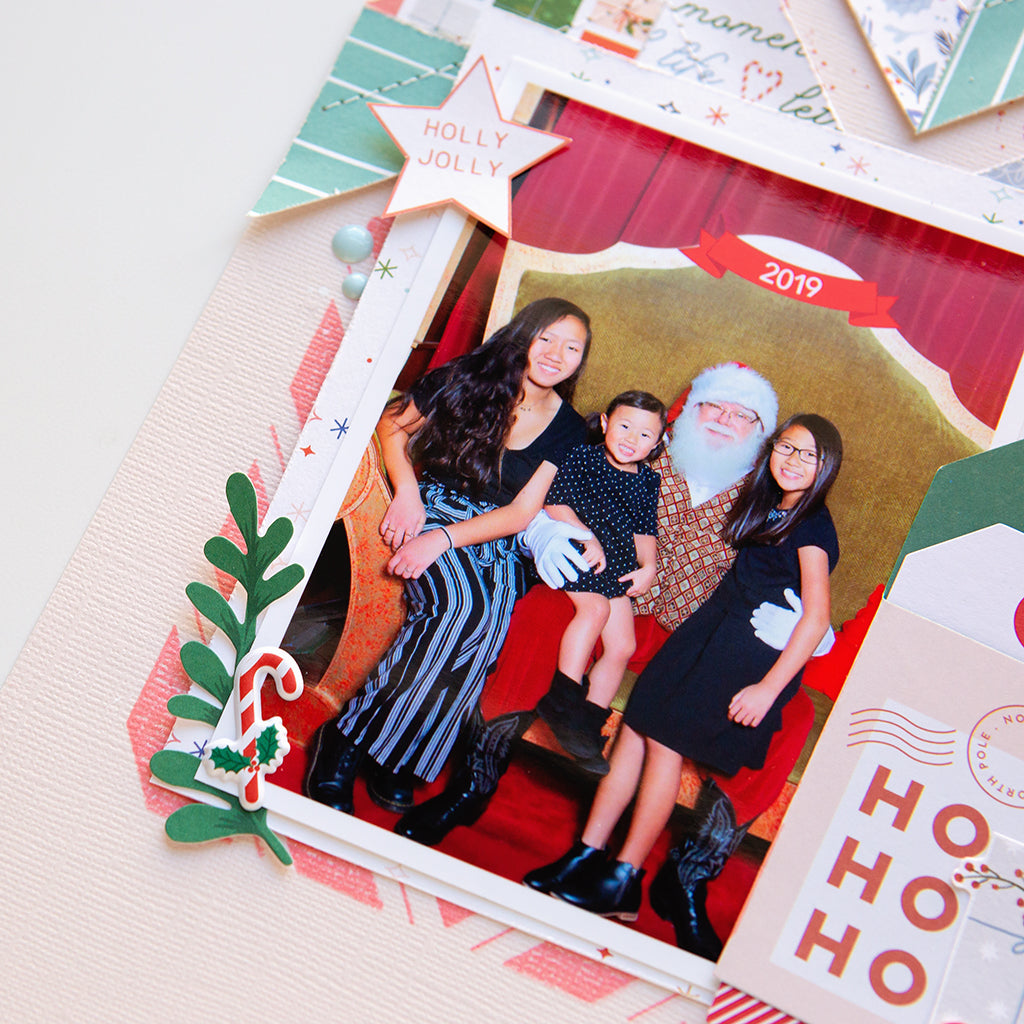
I knew I wanted a little bit of color peeking behind my photo, so I planned out where I wanted it to go, and stamped a pattern directly to the cardstock. I used the Nested Chevron stamp with the Coral Reef ink. I backed my photo with one of the 6x6 papers, and then adhered it with foam squares on top of the image I just stamped. Next, I looked through the collection to figure out how I wanted to embellish the layout. I picked a tag from the Journaling Bits set with the Ho Ho Ho sentiment (very fitting for a Santa layout), and adhered it slightly on top of the photo.

I decided to use the word Merry from the puffy phrase stickers as my title. Once I adhered it to the layout, I decided to add stitching through the sticker, and then added more stitched lines to use as lines for my journaling.

To finish off the layout, I added just a few embellishments. I added a few floral pieces from the ephemera pack, a few puffy stickers, a chipboard sticker, a few pieces that I fussy cut from pattern papers, and enamel dots.

I am so thrilled with how this layout turned out, and I'm so glad that I made a chevron paper layout! I hope you were inspired by my layout, and I hope you'll give a new technique a try.
Thank you for stopping by, and have a great day!