Memory Dex Shaker Cards | Celes Gonzalo
Hello crafters! How are you today! It's Celes here again. And as always I'm sooo happy to be back! Today I have a new ans different idea for you to try. I must say that I'm IN LOVE! I decided to make some memory dex cards... but I wanted them to have something nice and special. So, the answer was: shakers! Let's get started!

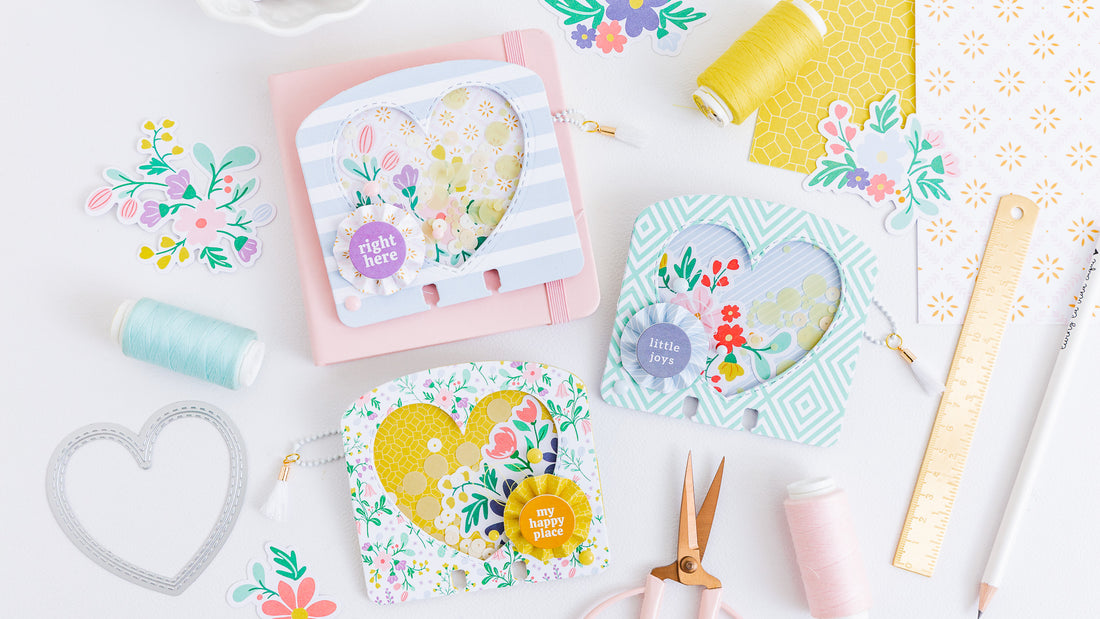
To make these lovely memory dex cards I used the beautiful Life Right Now Collection. Love all the flowers and details that it has. To cut dex memory cards you can use any method you want: with dies, electronic cutting machine, cut them by hand, buy pre-cut cards. The important thing to have in mind is that you need two pieces per memory dex. But I recommend cutting an extra piece of white paper to glue behind the piece that will have the perforation for the shaker.

To prepare my memory dex cards I used the 6 x 6 Paper Pack because I like the idea to have the smaller paper designs. To prepare the shaker you can use any of these dies: Essential: Shaker Heart Die Set, Essential: Shaker Star Die Set or Essential: Foldable Shaker Tags Set.

I decided to use the Essential: Shaker Heart Die Set because I wanted to add flowers to the back of the shaker. So the big heart die was ideal.

To prepare the shaker: glue the card already cut from design paper with the one of white cardstock. Use your cutting machine and cut out the desired shape in the center. Then, glue a piece of acetate behind the resulting piece. Glue 3d foam around the entire card without leaving any free spaces.
Then, take the other design paper cut card. Paste the flower in the desired place and cut the rest that you don't need (from the Floral Ephemera pack). Add the magic of the shaker: its color content. And finally you can paste all the pieces to form the memory dex shaker card. As a final detail you can add a mini paper rosette with one of the Chipboard Flair pieces and some Enamel Dots.

For memory dex shaker card back face: the back of the card is where I paced my photos and journaling. I made a kind of small pocket with strips of paper and added sewing details to them. I only glued them to the memory dex card along the bottom edge.


And I added a word from the Happy Heart Title Ephemera Pack and a piece from the Chipboard Flair. You can also use some pieces from the Puffy Stickers.


The memory dex cards are ideal for Instax photos. I decided to decorate them using the same design paper as I used for the memory dex cards and I added some details. I added a color eyelet and a paper detail cut with one of the dies from the Essential: Foldable Shaker Tags Set. As a final detail I added a small chain with a tassel. You can't imagine how beautiful it looks once everything is finished :)


Thanks for stopping by! I hope you like this idea ;)
See you next time! :)