
HOLIDAY MAGIC MINI ALBUM I KERSTIN SCHEIDLER
Hi everyone! Kerstin here today with an Mini Album idea for the most wonderful time of the year feat. the magical HAPPY HOLIDAYS collection. I love capturing moments with my loved ones and what better way to do that than with a Mini Album! I designed this mini album to have plenty of room for photos and journaling. Also it is - as I think - a fantastic gift idea. Let's get started!

I chose the size 4 x 4 inch. The mini album is not too big and not too small to hold memories. To decorate the cover of my mini I used the cute sock from the HAPPY HOLIDAYS Puffy Stickers, HAPPY HOLIDAYS Cardstock Stickers and HAPPY HOLIDAYS Ephemera Pack.

The album already looks "junky"! I have made the basic and will fill it with amazing memories in December. Or I'll give it away - but I'm not sure yet!

As a base I cut 5x white cardstock in size 4 x 8 inches and folded it in the middle. I chose 12 x 12 papers from the HAPPY HOLIDAYS collection. This was not so easy! I cut these 5 papers to the 4 x 8 inch size and folded at 2 1/5, 4 and 6 1/2 inches. The folding creates a "W" as you can see in the photo. I attached the designer paper to the left and right side with double sided tape - AFTER DECORATING! - to the white cardstock. That's all!
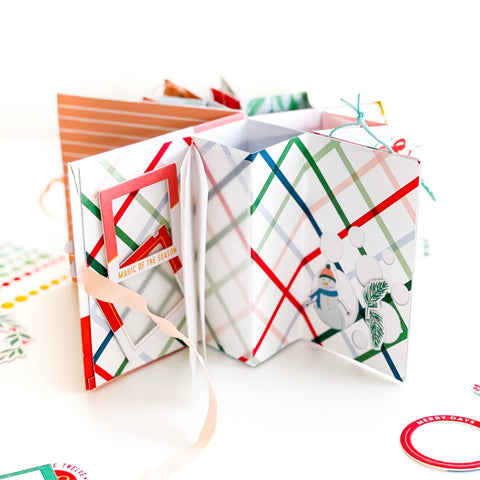
I used vellum paper to sew in two small double pages on the edge to have some extra space. I love these HAPPY HOLIDAYS Chipboard Frames. I taped vellum behind the bottom one to hold notes. I can stick my photo in the top frame. There is plenty of room in the middle and on the right for more photos or journaling.

I definitely have to show you these pages too! In the middle I have cut before gluing small triangles, so that the look of a Christmas tree is created. Behind it I glued Vellum and decorated with the HAPPY HOLIDAYS Enamel Dots. On the right I had to use the little house from the HAPPY HOLIDAYS Ephemera Pack. Isn't it cute? I traced the little house on some thicker copy paper, cut it out, punched holes and attached it with a little pearl clasp (what it's called exactly I don't know..). Here I can write memories or paste photos.

I really need to show you these pages too! Laugh ... Here I have cut Vellum on the left in the size 2 x 6 inch and folded at 3 1/8 inch. In the middle of the fold I punched in a circle so I could use one of the beautiful HAPPY HOLIDAYS Wood Accents. I stitched the vellum to my designer paper. Here, too, I can hold on to memories. On the right I have made a small insert pocket. Here I cut small slits in a 2 x 4 inch paper and glued it on. I taped the tape all around the edge to leave the slits free to put something in. In the center I sewed on the cute socks from the HAPPY HOLIDAYS Ephemera Pack. It looks like the socks are hanging on a fireplace - right?
Here come the other pages!


This mini has enough space for memories for the most wonderful time of the year! Whether I give it away now ... I'm not so sure anymore!
I hope I can inspire you to get creative with the magical HAPPY HOLIDAYS collection to keep YOUR memories. Thanks for stopping by!
See you soon!
Kerstin xx
1 comment
This is so amazing! Did you join the card stock base pieces together by gluing them back to back to make the original book?
Also, the covers – look like cardboard that have been covered?