
Heart Happy, Birthday Shaker | Anne Fiene
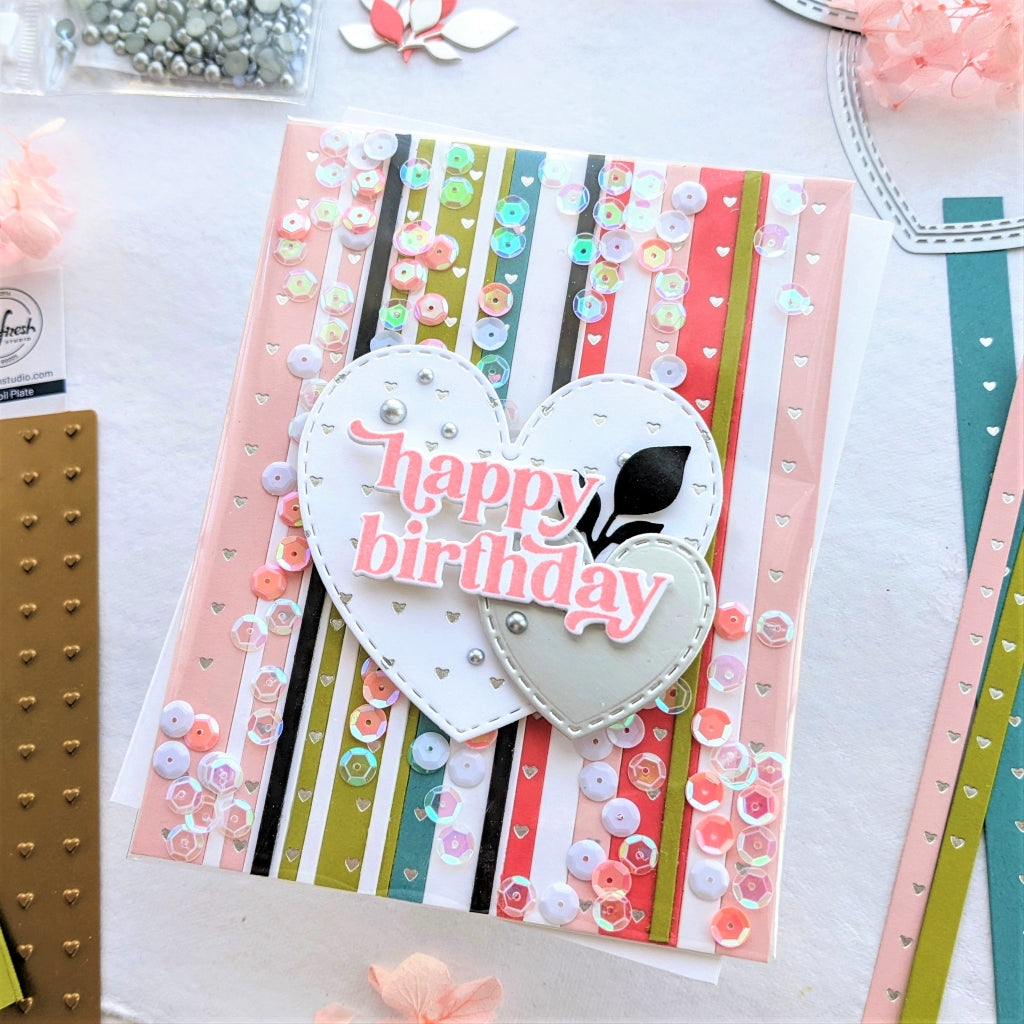
Hi everyone! It's Anne here up on the blog today with an edge to edge shaker birthday card made with the new Heart Grid hot foil plate. And while I would love to see those dainty hearts in all the foil colors, for my birthday card I think the strips of silver hearts add to the thrown confetti-like appearance of a sequin filled shaker. It just looks happy!

I started by choosing colored paper that I thought went well together and silver foiling the Heart Grid design onto them with no problems regarding over or under foiling even though the papers were sometimes of different weights and smoothness. I used Pinkfresh's Slim Stripes die set to cut out strips of varying width and although I do like the rounded edges that a die gives to the strips of paper, it might not have been the easiest way to do it, it was sometimes difficult to line everything up. First die cutting the strips and then foiling them might have been easier. Using your own cutter at home would work too.
I had an A2 sized piece of 80 lb. paper (copy paper would work fine) and glued down the first strip to the very edge, being extra cautious to get it on straight. Then I just kept adding strips, making sure to butt them up snuggly against the previous one. When I was done, I cut off the ends and had my fun stripe-y background. Then I remembered seeing not only a number of edge to edge shakers on Instagram lately but a really fun Live with Lea on the Pinkfresh Studio YouTube channel, where she makes a full panel shaker card that turned out so bright and pretty, so I decided to turn this into a shaker.

First, I applied strips of double sided tape to the back of the panel all around the edges. Then I used the front piece of older stamp packaging (cleaned it,) I laid it down on top of the card panel and folded only three sides to the back to be taped down. One side needs to remain open to put the sequins/jewels/shaker bits into. Then I taped down that fourth side to the back and my shaker panel was done. It was easy enough after that to attach it to a card base with more tape.
I was happy to use the Shaker Hearts die (the more hearts in the world, the better) to cut out a big heart from one of my previously foiled pieces of cardstock, and a smaller heart from silver specialty paper. I got the "happy birthday" sentiment using the Perfect Sentiments stamp set and die and added a black leaf flourish from my stash, I had used the Garden Wreath die set for that. This is why you save the extra bits... for awhile, not forever. I have a drawer FULL of stuff that I need to go through to decide if I have to hold on to it or not.

I adhered everything down using foam tape for dimension and finished it off with Pinkfresh Studio's dreamy Metallic: Matte Silver pearls. And I was done with my thrown confetti-looking birthday shaker card!
I hope that some of these design choices have inspired you to make something new today. Thanks so much for coming by!