Everything But Letterpress with Press Plates!
12 Nov 2024
0 Comments
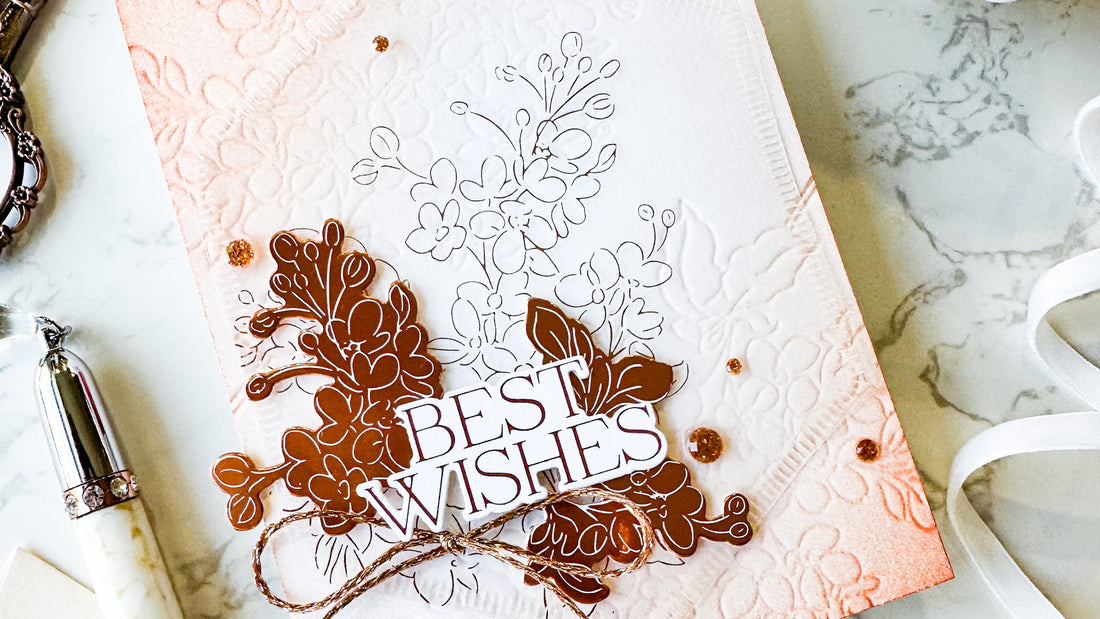
Hi friends! Emily Midgett here with you today, and I have some inspiration to share with you using one of the newer Press Plates, which I used without ink to create two different and unique images with a peachy glow. I know that having multiple systems can be a bit daunting and expensive, but the Better Press letterpress system and the coordinating plates really do have so many unexpected tricks up their "sleeves" that make them well worth the investment. I have this unique glowing peach project that I created with the newer Always Smiling Press Plate and coordinating die. Let's get started with the details on my project!

Whenever I am working with new Press Plates, I like to hot foil them onto a variety of surfaces, including acetate. Clear acetate has the advantage of incredibly smooth, and so works astonishingly well for hot foiling. I used some coppery satin hot foil to hot foil the delicate floral image from the Always Smiling Press Plate set. I paired the leftover foiled piece with the
Solid Hot Foil Plate to also have the negative image available as an accent! For my project today, I used the new
Essentials: Blanket Stitched Hexagons die to cut the acetate panel, and the Always Smiling coordinating die to die cut the foiled negative piece created with the solid hot foil plate.

After I had created the main focal point for my project, I turned to the background. One of my favorite things about Press Plates is the exquisite texture that they add to the background when used for dry embossing. For today's project, I simply placed the floral image from the
Always Smiling Press Plate set on my Better Press Letterpress system in the corners of my panel of letterpress paper, then ran it through my machine (here's the key) without inking the plate. This impresses the beautifully detailed design into the letterpress paper, adding a gorgeous debossed texture to the panel. I chose to enhance these details even further by using the new 1" Blending Brushes to lightly blend some
Persimmon ink around the edges of the letterpress panel, concentrating the color a bit more intensely on the areas that had been pressed. This helps to enhance those debossed details a bit more, increasing the visible texture.

For the greeting, I used the same satin copper foil to create a sentiment using the
Here For You Sentiments Press Plate and coordinating die. Before adhering my acetate die cut, I arranged the sentiment die cut on the foiled acetate hexagon die cut. I then snipped some of the flowers and stems from the solid negative foiled die cut, tucking them behind the sentiment with some liquid glue. After these had dried sufficiently, I flipped the acetate piece over and added some foam adhesive squares behind the solid die cuts, then adhered the entire die cut arrangement to my blended, debossed background. The extra height from the foam adhesive helps add a bit more interest and heightens visibility for the foiled acetate piece! Finally, I embellished the card with some coordinating sparkling copper twine and a few Glitter Drops: Butterscotch for added sparkle.
Well, that's all for my project today! If you haven't tried using your Press Plates as anything but Press Plates, you're missing out, and I highly encourage you to try it. Finding multiple uses for the same item is such a great way to get lots of bang for your buck! Thanks so much for stopping by today, and have a marvelous day!


