Mini album Enjoy with Keeping It Real | Susi Becerra
Hello everyone! It's Susi here today sharing a new project using the gorgeous Keeping it Real collection from Pinkfresh Studio which is already available in the online shop.
Today I have a pretty mini album and a box to put away it.


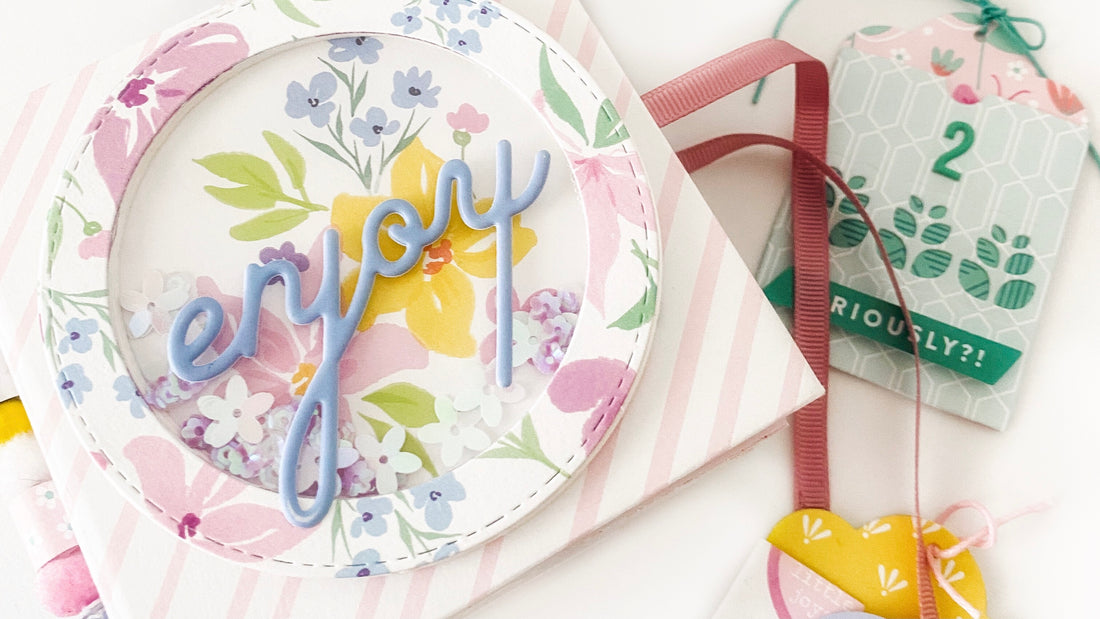
The size of the album is 4x4 inches and contains four pages and pockets to hold tags. I started the album with creating the cover. I used two pieces of heavy cardstock as a base and one piece as a spine, and I covered them with the Tiny Victories patterned paper.
To add more interest to the cover, I created a shaker using the beautiful Deep Breath patterned paper. I added the word Enjoy from the Puffy Phrase Stickers .
To embellish the spine I added 4 tiny eyelets using my Crop-A-Dile tool. Next, I created handmade paper rolls and strung these along the thread on the outside of the mini book. I also included puffy stickers from the collection and pompons for added pops of the color .


Next, I trimmed down 4 pieces of patterned papers into 8x8 inches and folded them in half. To attach the pages to the spine, I used the hidden hinges technique. To add more pages and interest to the album I attached additional pages to the basic pages using vellum and white cardstock. The pages are pockets.to include tags or photos.
Some details photos of the inside of the album.


I'm a huge fan of pockets, so in this page I created one to get more space for photos or journaling.

I created tags using the Essentials: Fillable tag with pocket Die Set to fill up the pockets. I die cut four tags using patterned papers from the collection. I added ephemera pieces and cardstock stickers to embellish the tags. I absolutely love those tags,, they give a special, elegant look to any project!


Lastly, I created a box to put away the mini book. To make it you need a 10x10 piece of paper. I chose the beautiful Deep Breath patterned paper.
I scored 2 1/2 '' from the left and 2 1/2'' from the right. Rotated 90 degrees and repeated. Next, I cut the left and right vertical score lines from the outer edge to the horizontal scores. I added adhesive to the outside edge flaps. The next step is fold inwards and adhere to create the base of the box.
To create the lid I used the same steps for creating the box. This time I wanted a bigger base so it would leave just enough room to fit over the box.
I wanted the sides to be 1''. I scored 1'' from the edge and then rotated it and repeated until 4 sides were scored. Once scored the lid, I cut and folded in the same way as the box base.
To embellish the box I handmade a flower using patterned paper and I added a fabric ribbon and a cardstock sticker.


I hope I could inspire you with my mini album. Thanks so much for stopping by the blog today.
Have a great day!