Milk Carton Boxes for a Lovely Birthday | Celes Gonzalo
Hello crafters! I'm Celes and it feel so good to be back here ;) Time for parties? Time for birthdays? Let's celebrate a lovely birthday in style! Yes! Today I'm going to show how to make these adorable and easy milk carton boxes for your next party. A sweet and clean project that you can make in any color combination. And one of the sets that PinkFresh Studio recently released is great for this idea.

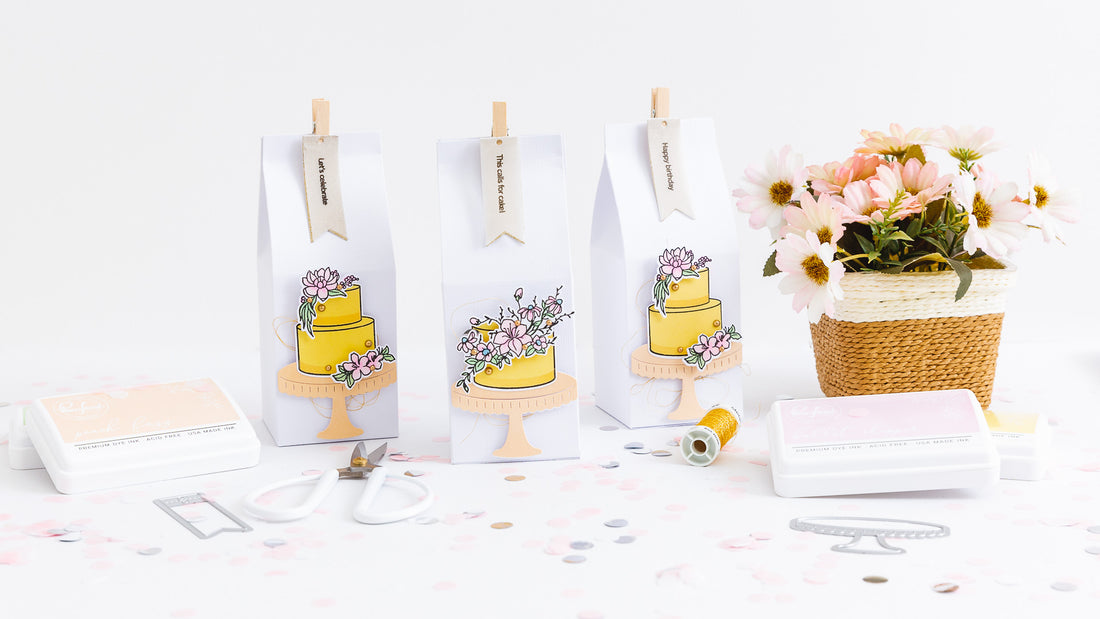
To prepare these milk carton boxes I used the Celebrate in Style Set and white cardstock.
Milk Carton Boxes: First thing to do is to prepare the boxes. You will need a piece of white cardstock of 10 1/2" w x 9" h for each box. Score at 2 1/2”, 5”, 7 1/2”, 10” (wide) and 2 1/2”, 6” (high). Cut a small piece to make the closure and the four base pieces to form the box.


Decoration: To decorate the boxes I used the Celebrate in Style Die Set, Celebrate in Style Stamp Set , Celebrate in Style Layering Stencil Set
I stamped all the designs I wanted to use with the Premiun Dye Ink Detail Black. And I colored them using the Layering Stencil Set my Premiun Dye Inks. I used these colors: Sky Blue , Mint , Sparkling Rose , Peach Fuzz, Fresh Pear, Ballet Slipper, Lemon Whip.
Once you're done, just cut them ;) I'm IN LOVE with die that embosses the base of the cake. It's incredible!


Details: To add other details to the boxes, have on hand: small clothes pins, gold thread and the Metallic Pearls: Matte Gold. Also I used the Mini Tags with Fillable Words with vellum and glitter paper.
Cut a set of mini tags for each box. And use the phrases from the Celebrate in Style Stamp Set to stamp the vellum tags. Stick the vellum and glitter paper tags together and then stick them onto the small clothespins.


Glue the pieces of the cakes in layers and add some pearls (Metallic Pearls: Matte Gold).
When you have everything ready, you can stick the cakes on the front of the boxes using 3d foam and placing gold thread in the background. Fill the boxes with sweet surprises and close them with the decorated clips.

Isn`t a wonderful and lovely idea? :) I hope you like the idea and that you can make many Milk Carton Boxes for your next party! YAY!
See you next time!
2 Comments
Brilliant idea!
Divinassss!!!🥰