Layouts Featuring Indigo Hills 2 | Lorilei Murphy
Hello Pinkfresh Studio friends! Lorilei here today sharing two layouts I love using the new Indigo Hills 2 collection! I was super happy to see the gorgeous designs and colors of Indigo Hills 2 in person! I chose to make two of the papers the star of my layouts!
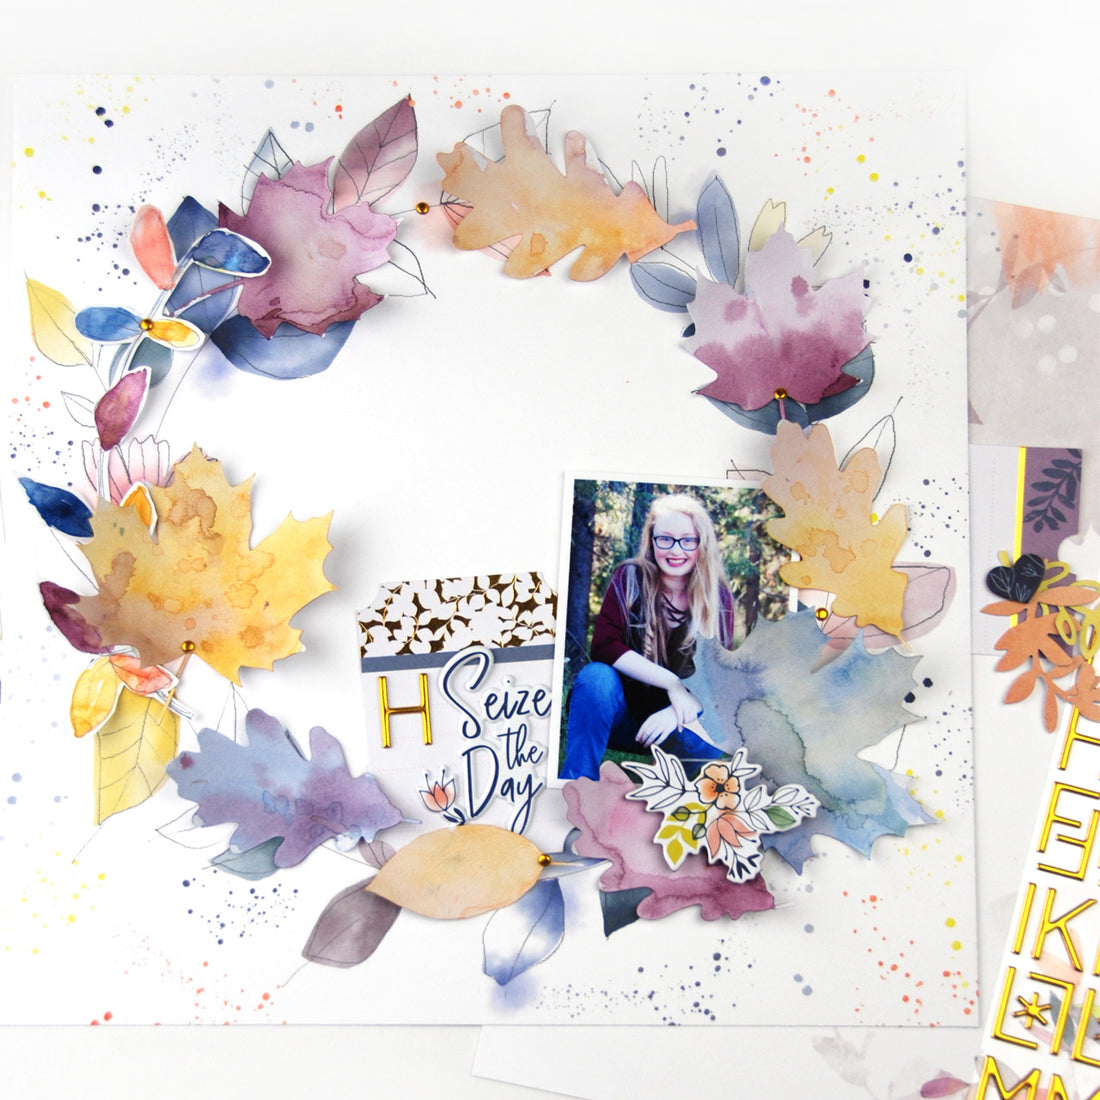
My first layout started off with the Meadow paper. Stunning!! I could look at this paper just as it is for a long time! I decided to play off the leaves, and I had a back to school photo I had in mind that would work perfectly.

I cut fall leaf shapes (from SCT magazine freebies) from white cardstock and then painted them with Pinkfresh Studio Liquid watercolors!

I was super inspired by the design on the paper so I also sketched and painted a vine of leaves for the wreath. A tip for the watercolors: let your first layer of paint almost dry and then splatter the same or different color watercolor on the leaves, it makes the most gorgeous splotches!!

Once the leaves were all dry I scattered them around the wreath. I loved how they looked and tacked them down with glue. I tucked my photo into the wreath and added a journaling card with a puffy sticker sentiment and my daughters initial with the Gold Foiled alpha. A chipboard cluster of flowers and a sprinkling of gold dots from the alpha finished of the layout!

My second layout started with the Ridge paper as my background. I layered the torn Eminence (both sides) paper behind my photo area and decided to make a linear design using the photos and embellishments. I chose pieces from the Indigo Hills 2 chipboard, die cuts and journaling pack and added them to either side of my photo.

I popped the flower out of the die cut frame and added it with a pop dot for extra dimension. The phrase stickers have so many wonderful sentiments on them; it was hard to choose one!

On the end embellishment, I layered multiple die cut pieces to look like I "clipped" them together. I also stamped the word wonder on the hanging tag using the Squirrel Friends stamp. It fit perfectly!

At the last minute, I decided to tear the middle out of the background paper. I then adhered the top and bottom to white cardstock. It made the layout less busy and showed off the photo and beautiful design of the Ridge paper!

Thank you for joining me today! Happy Scrapping!