Floral Envelope Mini Album | Celes Gonzalo
Hi everyone! How are you today? It's Celes here ;) I'm super excited to share my new idea with you today... Have you seen the latest release of Pinkfresh Studio ? I must say I'm in love with all of the new products. But... when I saw the Floral Envelope Set I already knew what I wanted to do... Mini Album! :)

I have used all the Floral Envelope Set to make this mini album. The Floral Envelope Stamp, the Floral Envelope Die and the Floral Envelope Stencil.

The Floral Envelope Die is the base of this design. In fact, I used the envelope die as a pattern to cut the cardboard pieces for the structure and all the pages for the mini album. Shall we start?

Structure: we need to cut 2 pieces of cardboard using the envelope die (mark the outer contour of the die with a pencil and cut) and 1 piece of 1 3/4" w x 1 3/4" h for the spine. To decorate all the mini album I decided to use the Happy Blooms Collection 6 x 6 Paper Pack (you can even use paper scraps). Choose 3 papers and prepare the structure.

Spine: for the spine I used one of the stamps of the Floral Envelope Stamp set and I painted it with the coordinated Floral Envelope Stencil. Also I added one piece of the Happy Blooms Ephemera Pack

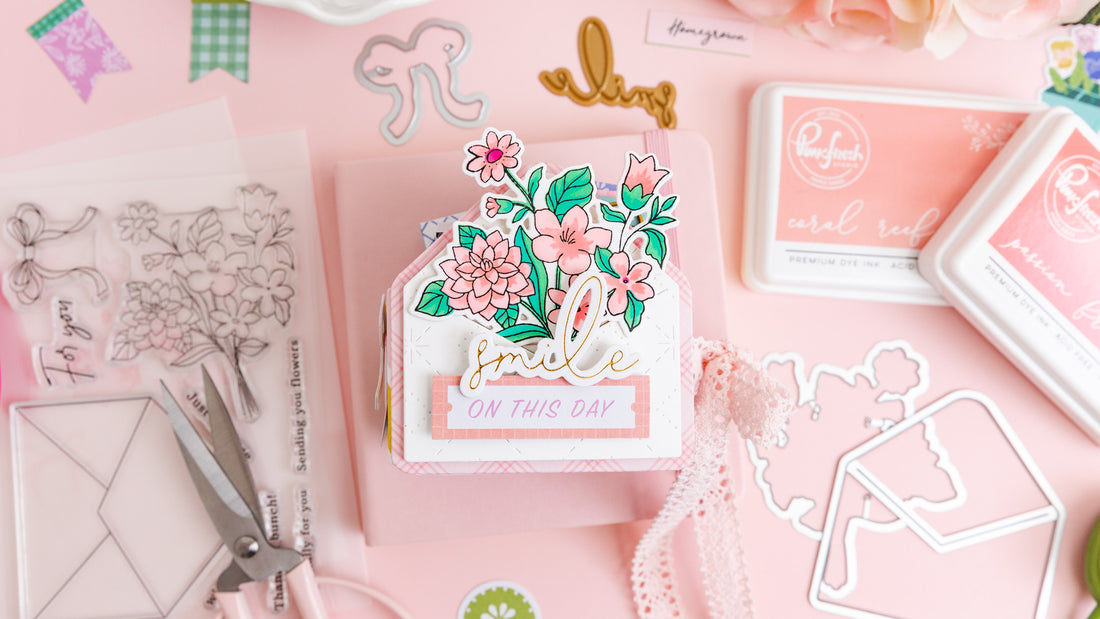
Cover: the floral bouquet of the Floral Envelope Stamp set was perfect for this super mini album :) Isn't it beautiful? I LOVE it! Besides, I used the new Fancy Scrips Words Set (it has the Fancy Script Words Hot Foil Plate and the Fancy Script Words Die). I chose the word "Smile" and I prepared it using gold hot foil. For the cover I also cut my first envelope using the envelope die of the Floral Envelope Die set with my cutting machine. Before cutting it I used the Sparkling Diamonds Die to give texture to the paper. As a final detail, I added a die cut of the Ephemera Pack .

Pages: for the interior of the mini album we need to cut 12 pages in the same way we cut both covers (mark the outer contour of the die with a pencil and cut). Try to use a not very thick paper. Also, we need to prepare a "U" spine with 6 hings in total. To prepare it: cut 3 pieces of white cardstock of 1 1/2" h x 3/4" w, 1 1/2" h x 1 1/4" w, 1 1/2" h x 1 3/4" w. Score each piece in 1/4" on both ends (width). Glue the 3 pieces together and add the resulting structure to the spine.

Interior: once you have all the pages, use the envelope die and the papers from the 6 x 6 Paper Pack to cut all the envelopes (to decorate every page). You will need 12 of them (cut in differents design papers).


As Happy Blooms is so colorful, I decided to print all my photos in black and white (square 2 1/4"). It's a very special mini album dedicated for the day of my "Happy Birthday" :)


I glued each of the decorated paper envelopes only around the edges. So I can place inside the photos, tags and everything I want :) To decorate every page I used pieces of the Ephemera Pack, Cardstock Stickers and Enamels Dots from the Happy Blooms collection. Also, I added some paper clips and and some stamped details. And voalá! Your mini is ready! ;)


Thanks for stopping by! I hope you like this idea ;)
See you!
3 Comments
Absolutely gorgeous and so creative! I have a new grandson and this would be a great idea! He is a special delivery! He arrived a month early! Thank you for sharing
Thanks for sharing this wonderful mini book. It is so cute! And also for sharing all the details so we are able to make one also.
Absolutely beautiful! Thanks for providing all the gorgeous details! 🥰🥰🥰