Playful Petals | Anne Fiene
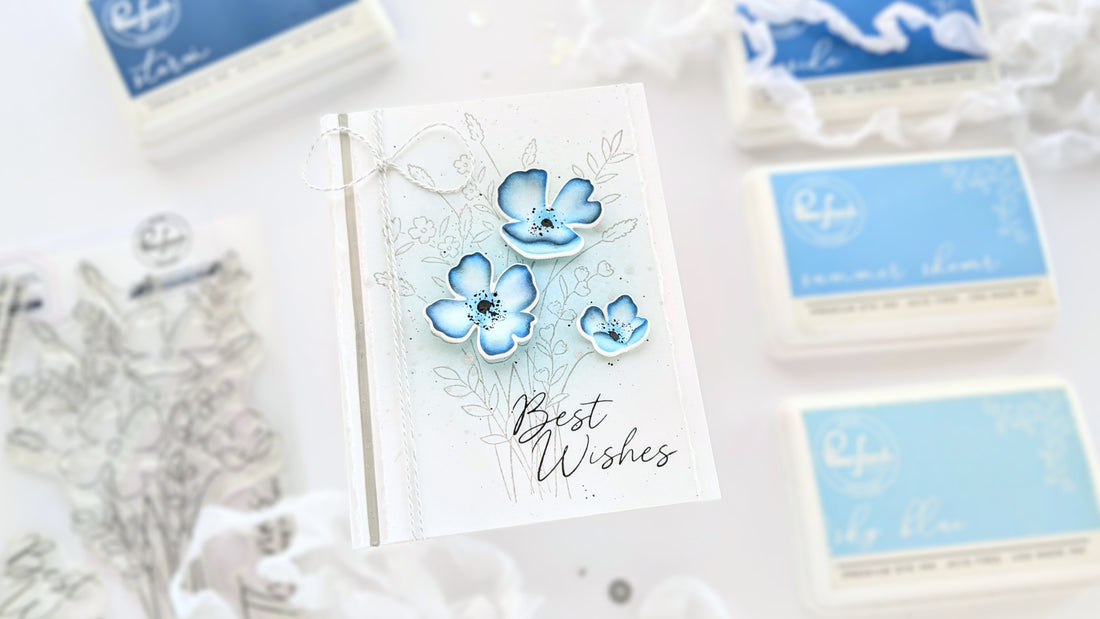
Hi everyone! I've got a card to share today that I made with Pinkfresh's new Playful Petals stamp, stencil set, and die. The set includes a die that cuts the outline of the bouquet and a die that cuts just the three larger flowers, making it easy to pop them up out of the bouquet!
I stamped the bouquet onto a panel of white cardstock using Rocky Slope. Then, I used one of PFS's new large blending brushes and blended a circle of blue over the center of the bouquet. I kept it soft and subtle using Sky Blue, with just a bit of Summer Shower in the center. Those brushes give such a smooth blend!

Then, I grabbed a ruler and laid it on its side along the bouquet, pulling a strip of paper against the ruler from the panel. I did this on both sides of the panel, and it ended up measuring about 3 1/2 X 5 1/2 inches. I like the "artsy" detail a torn edge lends.
I stamped the sentiment straight down on the torn panel with Detail Black. Then, I splattered some silver (Brutus Monroe's Tin Man) onto the card, but that ended up being difficult to see unless it was tilted just so. So I also splattered with black and set it aside for a few minutes to dry.
I stamped the bouquet with light ink again, then used the stencil set to color in just the three blooms I would cut out. I used all four colors in the Morning Sky collection. The whole flower was colored with Sky Blue. Then, closer to the edge of the petal, it was Summer Shower, then moving out from the center, Seaside and Storm. After all the colors were down, I used a tiny blending brush to apply some black ink along the tip of the petal for a little more drama.

I grabbed a piece of copy paper and stamped the bouquet to it. Then I used scissors and a craft knife to cut small circles over the flowers so that I could use that piece of copy paper as a mask and splatter directly in the center of the flowers but nowhere else. When that was dry, I cut them out with the die. I placed them on a couple of layers of fun foam and used the ends of the large blending brushes to gently "bowl" them. I pressed down with the brush while moving it in a circular motion in the center of the flower to get the petals to curve up. I used a smaller brush for the smaller flower.

I used the Border Stencils to apply a stripe of silver paste along the length of another cardstock panel. That one has a torn edge too. Then I taped that down to my A2-sized cardbase. I wrapped some silver and white twine around my topping panel and also stuck it down onto the cardbase. Then, I used glue to adhere the blooms to the topping panel, and I was done with my card!
I hope that you have been inspired to make something new today! Thanks so much for coming by!
-Anne


1 comment
Oh my goodness! This is absolutely stunning!! Thank you for the tutorial!!