
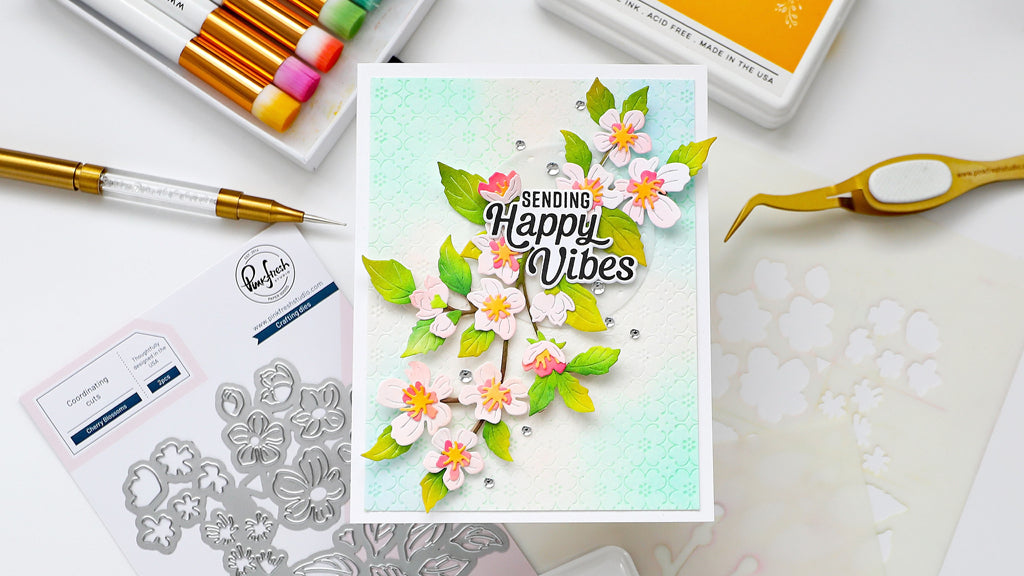
Welcome to the blog Pinkfresh friends! I am up on the blog today featuring the Cherry Blossoms stencil and Cherry Blossom die combo, Happy Vibes stamps and Happy Vibes dies. I used the Dotted Petals press plate and inked it partially over a pretty water-colored background. I also used the Folk Edge Circle dies.

I started by adding some Pinkfresh watercolors to the watercolor paper (both will be releasing soon). Let it dry. Next I used the mint ink to the corners of the Dotted Petals press plate. Dab some ink using the 1/2 inch blender brush. Take the letterpress impression.

I then sponged inks through the Cherry Blossoms stencils using the 1/2 and 1/4th inch Blender Brushes, die-cut using the dies. I created this twice.
Flower layer light: Coral Reef, Ballet Slippers
Flower layer dark: Coral Reef, Raspberry Bliss
Flower center: Coral Reef, Marigold
Leaves: Bay Leaf, Key Lime, Olive, Evergreen
Branch: Doe, Gathered Twigs, Key Lime, Bay Leaf

Stamp the sentiment using Detail Black ink, die-cut using the coordinating dies. Die-cut a vellum circle using the Folk Edge circles dies. Adhere the sentiment to the vellum using 3d foam. Adhere this to the card.

Adhere one of the cherry blossom twig coming down from behind the sentiment, Cut part of the second twig and adhere it going up from the sentiment. I used 3d foam to some of the flowers for added dimension. To finish adhere a few Clear Drops in Ice.
Thank you for dropping by and have a nice day!

Leave a comment
All comments are moderated before being published.
This site is protected by hCaptcha and the hCaptcha Privacy Policy and Terms of Service apply.