Partial Die-cutting two ways | Isha Gupta
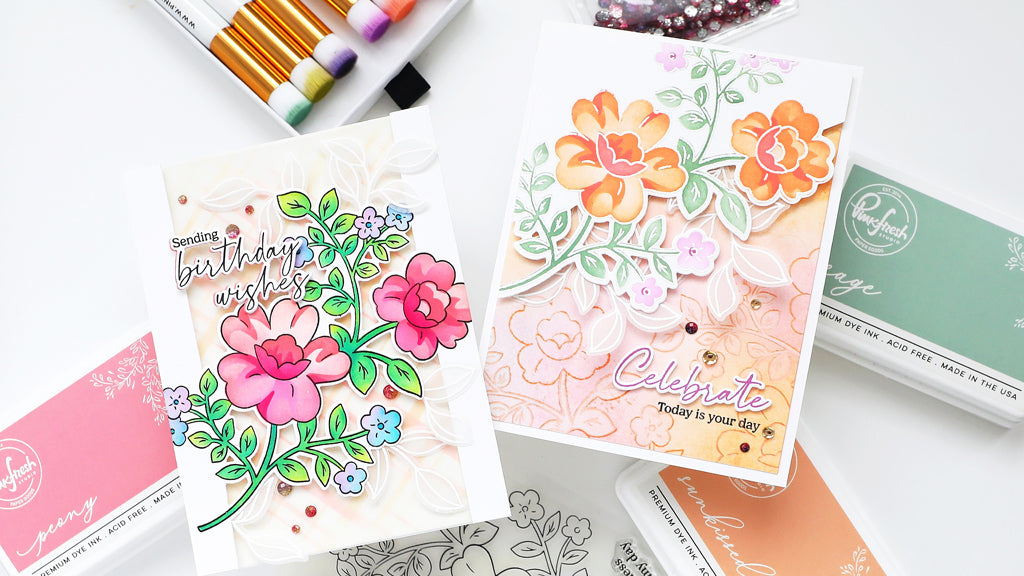
Hello everyone I am happy to be back on the Pinkfresh Studio Blog today with two cards featuring the partial die-cutting technique. The Never Give Up stamp is perfect size for the technique and the Joyful Day and Diagonal Plaid press plate complimented the project beautifully. The challenge theme for May is "Flowers", so this is an additional motivation to use these gorgeous floral image.

To start with, I used the Diagonal Plaid press plate and created the pattern using Peach Fizz and Coral Reef ink with the Better press system.
I then stamped the image from the Never Give Up stamp set using Detail Black ink. Use the coordinating die and instead of putting the second cutting plate above it, I used the cutting plate from mini die-cutting machine and put it on the center of the panel.

This would cut only the center parts of the die, remove the extra using a craft knife to get the straight edge.
Take this panel and using the coordinating stencils sponge inks (Grassy Knoll, Paradise, Soft Lilac, Begonia, Coral Reef, Mulberry Blush, Peony, Sparkling Rose, Raspberry Bliss) to the image.

Stamp the leaves from the Joyful Day stamp using watermark ink onto vellum, sprinkle opaque white embossing powder and heat set. Die-cut using the coordinating dies. Adhere parts of it behind the floral image.
Next I added vellum to the plaid piece to soften the background. Adhere the floral panel using foam tape.
Stamp the sentiment from the Joyful Day stamp, die-cut. Add a coral color die-cut slightly off-set and using 3d foam add to the card.
To finish, I added some Ombré Pixie Dust glitter drops.

For the next card, I stamped the image to a white panel onto one corner using watermark ink, sprinkle opaque white embossing powder and heat set. Now put the coordinating die in place but put the second cutting plate on an angle towards the lower edge only. This would die-cut only the lower part of the image. Add color using stencils with these inks (Sage, Eucalyptus, Sunkissed, Peony, Soft Lilac)

Sponge a panel using Sunkissed, Sheer Freesia and Soft Lilac ink. Stamp the image using sunkissed ink. Using the stencil, tap Calico white ink to the leaves and the small flower.

Adhere the embossed vellum leaves to the back of the floral panel and then this panel to the inked panel using foam tape. I used the sentiments from the Joyful day stamp.
To finish, adhere the panel to a white cardbase and add some Champagne clear drops and Ombré Twilight glitter drops.
Hope you enjoyed the technique. Thank you for dropping by!


