Hydrangea-Inspired Die Cuts with Emily!
24 Jul 2024
0 Comments
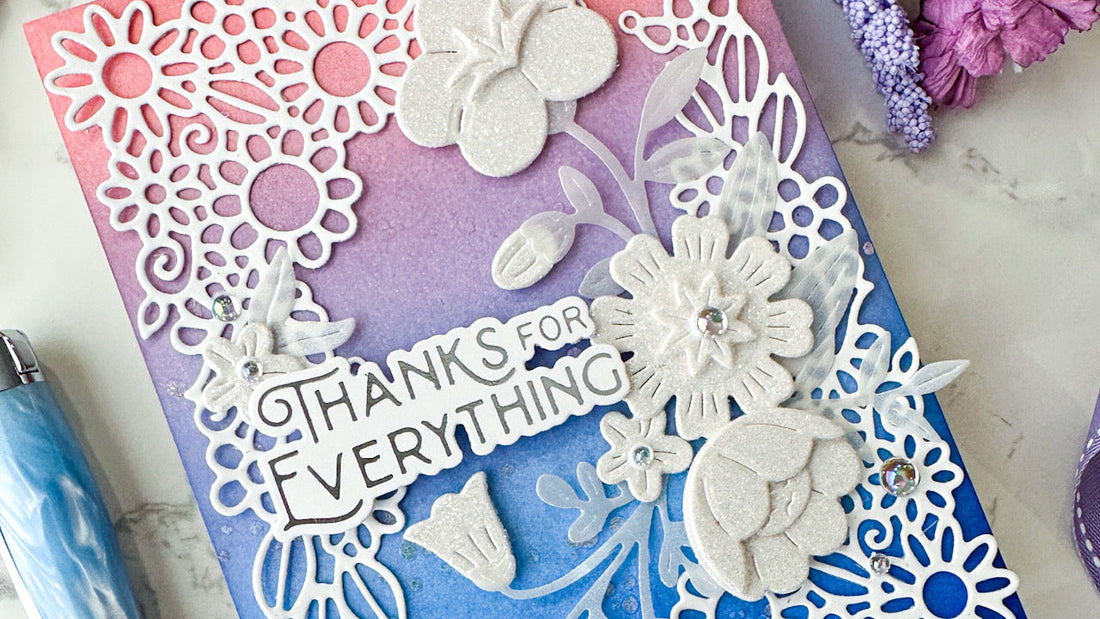
Hi friends! Emily Midgett here with you today, and I have some inspiration using a color palette from one of my favorite flowers: the blues, purples, and pinks of the gorgeous hydrangea flower! I enjoy using bold ink blending to highlight beautifully detailed die cuts, and so creating a lovely ombré blend with the gorgeous Pinkfresh Studio blues, purples, and pinks was a perfect perfect backdrop for the super intricate Floral Outline Frame. Let's get started with the details!

To start my project, I selected some gorgeous inks from the vibrant Pinkfresh Studio Ink line: Peony, Wisteria, Slumber, and Sapphire. I used large blending brushes to blend the colors in a smooth ombré down the front of my A2-sized panel of white cardstock. In order to achieve a super smooth and vibrant blend, I did go over the entire background multiple times with each color, which helps to really saturate the cardstock and create a smooth transition between each color. After I had completed the ink blending, I splattered some sparkling iridescent glitter watercolors to create a bit of magical interest to the background.

To highlight the vivid blended background, I decided to die cut the Floral Outline Frame from some plain white cardstock. The intricate details of this die stand out exceptionally well against the vibrant colors. After adhering the detailed cover plate die cut to the background with some micro dot adhesive, I die cut some floral accents using white glitter paper and the Sweet Blossoms standalone die set. I adhered the different elements for each flower together using foam adhesive to add some extra textural interest and height, which helps these monochromatic images look a bit more lifelike. I also die cut the foliage from some silver pearl vellum. I like to use multiple textures when working with monochromatic die cuts; I think that it helps to keep things from looking flat despite only being one color!

For the greeting, I used one of the lovely sentiments from the Wonderful Sentiments hot foil plate set, hot foiling it with shiny silver foil. I die cut the greeting with its coordinating die, then adhered it to my ombré background using a double layer of foam adhesive. I then began the work of arranging the flowers and foliage around my sentiment die cut, using multiple heights of adhesive for the different flowers and foliage to keep things interesting! Finally, I added a few Iridescent Clear Drops for some added shine!
Well, that's all for my project today. I love finding new ways to allow intricate die cuts to shine on their own, and an ink blended backdrop is the perfect way to make those delicate die cuts the star of the show! Thanks so much for stopping by today, and have a marvelous day!


