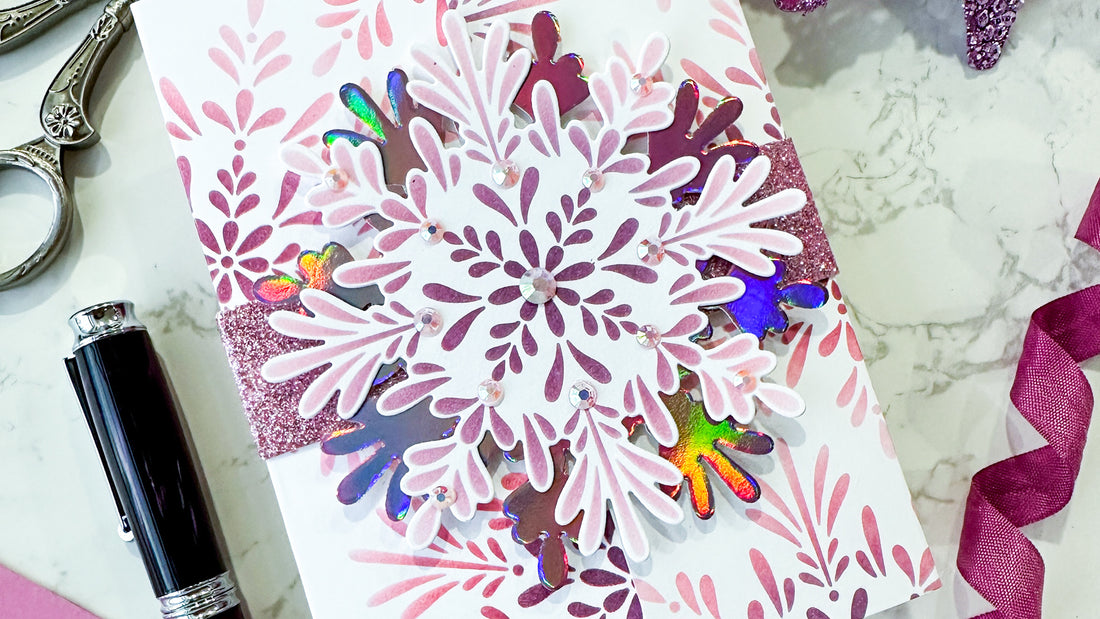
Gate Fold Snowflakes Card with Emily!
27 Nov 2024
0 Comments
Hi friends! Emily Midgett here with you today, and I have a mauve, shiny, and unique card to share with you featuring the gorgeous snowflake images from the Radiating Snowflake product suite. This group of products features an enormous snowflake with coordinating stencils, Press Plates, and dies, so that you can select which techniques you'd like to use! I wanted to play with some warm pinks and purples for today's card, opting for a soft and smooth blend of color to create a lush and feminine snowflake background. I also wanted to try out a "fancy fold" card by creating this gate-fold card with a belly band. Let's get started on the details of this fun and elegant card!

To start, I used the 1" Blending Brushes with Cherry Blossom, Begonia, and Candy Violet inks and the
Radiating Snowflake Stencil to create a full snowflake background on a panel of 8.5" x 5.5" white cardstock. Because the Radiating Snowflake Stencil is only one layer and of a significant size, it is extremely user-friendly and makes quick work of an intricate background on this large panel of cardstock! I first blended the entire snowflake with Cherry Blossom ink, then about 2/3 of the snowflake with Begonia radiating out from the center, then finally adding some Candy Violet in the center to create beautifully soft mauve snowflakes all over my panel. I also used a blank panel of A2 cardstock to blend another of these pretty pinky snowflakes to die cut with the
Radiating Snowflake Die as a standalone snowflake.

After I had created my full patterned snowflake panel and my single die cut, I used a bone folder and score board to score the large panel 2.25" from either end, then folding each side over to create a gate-fold card. To keep the card closed, I created a belly band from some Blush Glitter cardstock, trimming down a 1.25" x 11.5" strip and folding it around the gate-fold card. I folded the glitter strip and made the crease crisp (say that 5 times fast!) with my bone folder, then trimmed off any excess and adhered the two ends together with liquid adhesive. To cover the seam on the belly band, I used the single stenciled Radiating Snowflake die cut, which I enhanced with a plain Radiating Snowflake die cut, cut from some iridescent purple mirror foil cardstock. I layered the two snowflake die cuts together with liquid glue, offsetting them so that they created a full and lush snowflake. The shining foil cardstock also helps the stenciled snowflake stand out a bit from the stenciled background! I adhered the snowflakes to the belly band, covering up the seam where the ends of the belly band met, and then added a few
Ballet Slipper Jewels to add extra sparkle to the snowflake.

After I had created the outside of the card, I turned my attention to the inside of the card. I stamped a sentiment from the Holiday Greetings Sentiments Stamps onto a panel of 4" x 5.25" white cardstock using
Regal Kiss ink, then used my Better Press system to add subtle texture to the sentiment panel with the Radiating Snowflake Press Plate. I simply placed the snowflake approximately where I wanted it on the panel of white cardstock, closed up my Better Press System, then added a shim of cardstock to add a bit of extra pressure, and ran it through my Platinum 6 machine. This technique adds the tiniest hint of texture and pattern to the interior panel without overwhelming it or adding any additional color. It's so clean and pretty and has plenty of room to write a message on the panel.
Well, that's all for my project today! I love trying out new ways to keep cards interesting while still making them easy to mail, and this gate-fold card with a belly band certainly fits the bill. Thanks so much for stopping by today, and have a marvelous day!


