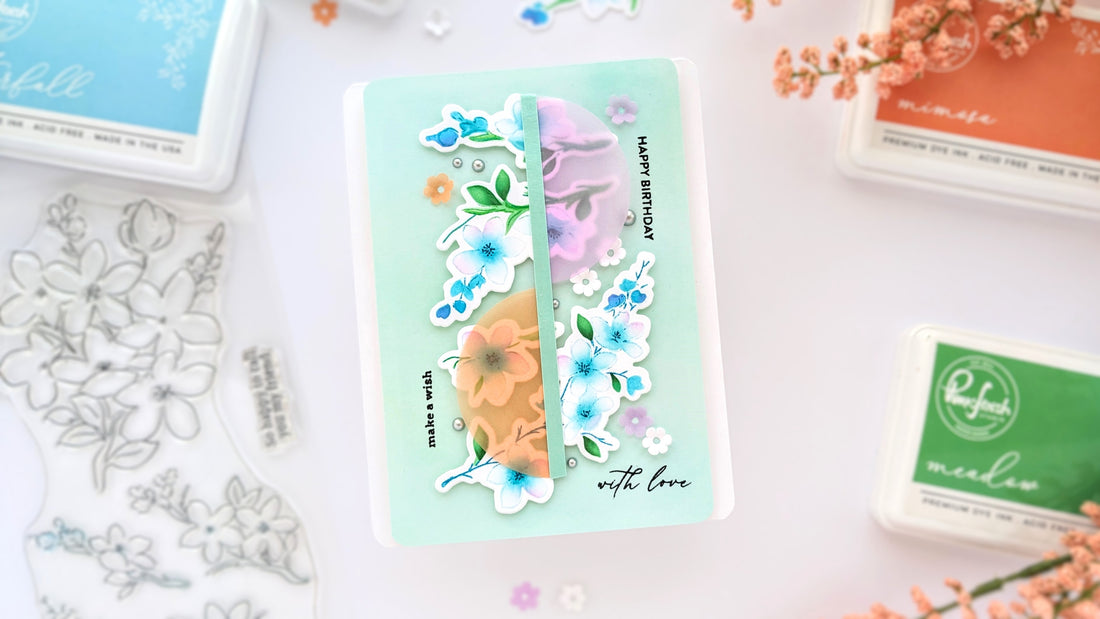
Modern Sakura Blossom Card Inspired by this Month's Challenge| Anne Fiene
Hi everyone! Today, I'm on the blog with a card I made with Pinkfresh Studio's beautiful new Sakura stamp, stencil, and die. Even though I knew I wanted to make a card using this design, I found myself stuck for inspiration. Then, I discovered that this month's PFS Monthly Challenge was "Circles and Rings." Once I put these two design elements together, the ideas started coming again. Entering a challenge is a great way to help you get moving if you struggle for inspiration.

I love a fluttery, soft pink Sakura blossom in the Spring, but today, I had a different color palette in mind. I started by inking a panel of cardstock with Mint and Ocean Breeze. Then I used the Sakura stamp with Sky Blue for a light outline on another card panel; I love the wispy look this achieved once colored in. I used the Sakura stencil with Waterfall, Turquoise, and Paradise very lightly for the flowers, with a bit of Soft Lilac here and there on the petals for color variation and interest. For the leaves, I used Meadow, Emerald City, and Evergreen. Then, I put the cardstock panel back in my stamping platform, used Atlantis with a Q-tip, and applied the dark color in the center of the blooms. (Tsukineko has a brush tip ink applicator I'd like to try) I grabbed a couple of pencils to go over some of the stem details; then I die-cut everything out.

Before I used foam tape to adhere the die-cut branches to the panel, I cut off a bit of each side; the panel measured 3 3/4 X 5 1/2 inches and rounded the corners. I figured out how I wanted to arrange the branches, but before adhering them down, I stamped a few darling, tiny sentiments from the With Love stamp set. I also popped up the panel with foam tape before I stuck it down to the A-2-sized cardbase. Then, I taped the Sakura branches in place.
I colored two pieces of vellum using Mimosa and Lavender. Then, I selected a die from PFS's Nested Circles and cut out a couple of circles. In my stash, I had a panel of cardstock that had been hot-foiled with green pastel foil using the Solid Hot Foil Plate. I like the subtle shine of the foiled paper. I cut a strip from it, then centered and glued the vellum circles underneath it. I cut off the opposite half of each circle and glued this straight down on the arranged branches.

I loved this modern touch added to the wispy Sakura blooms. Using the Stylized Florals die set; I placed a few tiny blooms here and there. I also put some bling, Metallic Pearls: Matte Silver, in a few spaces. Then I was done!
I hope some of these design choices have inspired you to make something new today. For more ideas, take a look at this month's Pinkfresh Studio Monthly Challenge. Thanks so much for stopping by!
-Anne


